Pages

October 23, 2013

Sharjah Shake

Oh gosh !! I haven't blogged for a while; not even logged in to my blogger account. I should say got a bit bored with this.How I wish to continue this food blog;  it all depends on my mood swings. We have moved back to Bangalore and my little one did have trouble to adjust in her new school. Now she's happy but still she miss her Sydney friends & family.
So here I am back to blogging the luscious Sharjah shake made last weekend at home. This took me back to my childhood days, when we used to go  Kalandan's Juice shop at Kozhikode to have this shake in the Beer glass :) Came to know that the owner of Kalandan's did introduce milk shakes to Kozhikodan's. Their very famous list includes Sharjah, Chikku.Mango and Buttermilk shakes.

Coming to the recipe, this is really simple. Just blend all ingredients together in a blender/mixer and your shake is ready. The consistency should be really thick once blended.

Ingredients:

Small bananas - 8-9 nos, preferably Aanipoovan as called in Malabar
Sugar - Half a cup, as needed

Instructions:
  • Blend the small bananas and sugar in a blender into a smooth paste.
  • Add crushed frozen milk and blend it with the banana paste.
  • Transfer to a Beer glass and serve immediately.
Notes:
  • Make sure the milk is frozen well. Crush the frozen milk before adding to the blender.
  • The shake consistency should be really thick and icy cold.
  • Very important to serve it right away after blending

April 22, 2013

B'day Cake !!

Another attempt on cake decorating with fondant for my better half's birthday. He's crazy of his cam and lens. So this Nikon DSLR camera cake for the birthday boy.


April 9, 2013

Vendakka puli/Okra in tamarind pulp

Learnt to make Vendakka puli from my mummy. This is sort of sweet, tangy and hot thick consistency curry. Supposedly I've covered most flavours :) Yes, it is indeed a wonderful combination.

I get this feeling whenever I taste it; at first a sudden hit of the sweetness from jaggery, then the tangy taste of tamarind and the hotness from the chillies. Oh la la !!!

We mostly have Kerala recipes at home; rice, curry, upperi etc. But haven't posted much veggie recipes on my blog. That's mainly because veggie recipes doesn't appeal much to my husband and I don't try new veggie invention. He's a non-veg crazy chap. If it's only veg items served, then the food intake would be much less. So I prefer making non-veg for my family. Not to mention my little one, Dyuti's got strange preferences. Whatever be the dish, she sniffs it at first. Only once it passes the sniff test, she does allow to try it out. Well, Dyuti is not that into meat like her dad; still a bit fussy. Here goes the recipe.

Recipe Source: Mummy

Ingredients:

Okra/Ladies finger - 6-7, cut in rounds medium thick
Mustard seeds - 1 tsp
Onions - 1, chopped (Best to use eshallots or kunjulli)
Green chilli - 1, chopped
Ginger - 1 inch piece, finely chopped
Fenugreek seeds - ¼ tsp
Tamarind - a disc shaped
Curry leaves - 2 sprigs
Turmeric powder - ½ tsp
Red hot chilli powder - ½ tbsp
Kashmiri chilli powder - 1 tsp, for the colour
Jaggery - a small piece
Asafoetida - a pinch
Water - 1 cup
Salt
Oil - I used a comb of olive oil and a dash of gingelly oil

Instructions:
  • Soak tamarind in hot water.
  • Pour oil on a hot pan.
  • Add mustard seeds when oil is hot and let it splutter. Then add fenugreek seeds and fry for few seconds.
  • Add chopped onion, green chilly, ginger and curry leaves. Fry till onion turns translucent.
  • Now add the cut okra's and fry for 3-4 minutes.
  • Add turmeric, red chilli and kashmiri chilli powder and let the spices turn fragrant.
  • Crush the tamarind that is immersed in hot water using your fingers and strain the tamarind pulp.
  • Pour tamarind pulp to the fried okra's. Add the jaggery, salt and allow to cook.
  • Allow the gravy to thicken. Check for the salt and the hotness of chillies. Add chilli powder if required.
  • Add asafoetida when the gravy has thickened and switch off the flame.

April 7, 2013

Lamb Kofta

Been drooling over Kofta ever since I started watching the Aussie cooking challenge show "My Kitchen Rules". Browsed for the recipe on their home page and found many variations of Kofte. Finally I chose to go with this recipe that suits my families palette.

Recipe Source: Adapted from "My Kitchen Rules"

Ingredients:

Lamb mince - 500 gms
Onion - 1 no, finely chopped
Green chillies - 3 nos, finely chopped
Ginger garlic paste - 1 tsp
Cumin powder - 1½ tbsp
Fennel powder - 1½ tbsp
Coriander leaves - handful, finely chopped
Mint leaves - handful, finely chopped
Salt
Wooden skewers
Instructions:

  • Soak the wooden skewers in water; else it will get burnt when placed in grill.
  • Mix all of the remaining ingredients using your hands and place in the refrigerator for 3-4 hours.
  • Take a small portion of the mixture, roll into ball shape, flatten lengthwise and roll it on a skewer; repeat with the remaining skewers.
  • Refrigerate the rolled skewers for 30 minutes.
  • Pre-heat the grill to medium heat and lightly oil the grill.
  • Place koftas on the preheated grill and spray cooking oil over.
  • Cook the kofta until it reaches your required doneness; turn when the top part has changed brown in colour. Roll the koftas and make sure it has browned on all sides.
  • Serve with mint flavoured yoghurt dip.
Note:

Lamb Koftas can be made on stove top if grill option is unavailable. Roll the koftas and fry on a non-stick pan.

April 4, 2013

Grilled Chicken with Asparagus

At times I get bored making the same rice, curry and then feel like why not make something simple but also a filling dinner. Then thought about grilling. It's been sometime I haven't made use of my grill.

By the way I've enrolled my little one Dyuti for Ballet and she just loves her ballet class. Got inspired from the cartoon "Angelina Ballerina". The first term is gonna get over and there's a concert coming up. She's all excited to play on the stage with Ms.Imogen & her dance mates.

After the 45 minutes class, Dyuti gets bit tired and her Amma as well. Might be wondering why would I get tired? Oh, it is actually 30 minute walk uphill and that too on such a hot sunny day.  We were so tired last week and I decided to put something on to my grill. On our way back, we went to butcher shop and bought chicken breast. I had stocked up two bunches of asparagus and is a wonderful combo with grilled chicken.

Another advantage of making grilled chicken would any leftovers can be thrown into a quick chicken fried rice for next day's lunch box :)

Ingredients:

Chicken breast - 2
Salt
Pepper
Mixed dry herbs
Oil

Instructions:
  • Clean the chicken breast. Pat and dry well with kitchen tissue paper so as to absorb the water.
  • Apply salt, pepper and dry herbs and rub on both sides of the chicken breast.
  • Marinate for 2 hours.
  • Pre-heat the grill to medium. Brush oil on both sides of the marinated chicken.
  • Place both chicken pieces on the grill and grill it for 20 minutes until you have a golden crispy top.
  • Turn the chicken and let it grill on the other side for another 15 minutes. Place the asparagus at this stage.
  • Check for doneness by cutting a piece. If the juice runs clear and the flesh isn't pink in colour, then it is done.
Note:

Adjust the quantity of salt, pepper and dry mixed herbs as per your palette.
If you don't have dry herbs, you may go for freshly chopped rosemary/thyme.


March 20, 2013

Ginger Panna Cotta with Pineapple salsa


We are now die-hard fans of Panna cotta. Introducing my post of ginger and lemon infused panna cotta with sautéed pineapple salsa. I really hope to post many more varieties of panna cotta :)

Panna cotta desserts can be made ahead of party and will surely be a hit. No need of baking. It can be set either in ramekins or in dariole moulds.

Adapted from Gail Simmons "A twist on the classic Italian dessert"

Ingredients for Panna Cotta:

Milk - 1 cup, another ¼ cup to bloom gelatin
Whipping cream - 1 cup
Sugar - ½ cup
Fresh Ginger - 6 slices
Lemon peel - 1 strip
Vanilla extract - a dash
Gelatin - 2 tsp
Non-stick spray - to grease ramekins

To prepare Panna Cotta:
  • In a saucepan, pour 1 cup milk, whipping cream, sugar, ginger slices, lemon peel, vanilla extract and heat in medium flame.
  • Bring to simmer, switch off the flame and cover with a lid. Allow to steep for 20 minutes.
  • Meanwhile bloom the gelatin. To bloom, warm ¼ cup of milk and sprinkle the gelatin powder on top. DO NOT STIR YET. Leave it for 5 minutes to soak and soften; then stir the milk and combine the gelatin. If any lumps form, warm the milk and give a good stir; make sure you do not boil the milk as the gelatin loses the settiing agent when boiled.
  • Now pour the gelatin dissolved milk back to the saucepan and give a good stir. Pour through a sieve to remove the gelatin lumps and the ginger lemon peel.
  • Spray the ramekins with non-stick spray to evenly coat the insides. Pour the panna cotta mixture evenly on the ramekins, cover with cling film and refrigerate for 5 hours or overnight to set.
Ingredients for Pineapple salsa:

Chopped fresh pineapple - 1 cup
Sugar - 2 tbsp
Water - 2 tbsp
Fresh ginger - 2 slices, cut in julienne

To prepare Pineapple salsa:
  • Heat sugar and water in a saucepan.
  • Add chopped pineapple and ginger and cook it turns soft.
  • Cool the mixture. Strain the liquid and reserve the pineapple.
To Assemble:

  • Once the panna cotta is set, invert the ramekins on to a plate.
  • Garnish with pineapple pieces on top and pour the liquid over the sides.

March 16, 2013

Stuffed Capsicums


Tasted stuffed capsicums first time from Subbuchechi. It is very filling and can be added to dinner menu. Can roast other veggies along with it; I've baked asparagus which goes well this.

Recipe Source: Subbuchechi

Ingredients:

Capsicums - 3 nos
Potato - 2 nos, big ones
Onions - 2 nos, finely chopped
Green chilies - 2 nos, finely chopped
Ginger - ½ tbsp, finely grated
Garlic - 1 tbsp, finely grated
Turmeric powder - ½ tsp
Coriander powder - ½ tbsp
Fennel powder - 1 tsp
Garam masala - ½ tsp
Corainder leaves - a bunch, finely chopped
Breadcrumbs - ¼ cup (optional)
Cheese - handful
Salt
Oil

Instructions:

For stuffing:

  • Peel the potatoes and cut in cubes. Apply salt and mix well. Put the chopped potatoes in a microwave safe bowl and microwave until soft, cooked. No need to add water to microwave the potatoes.
  • Heat oil in a pan. Add chopped onions and green chillies. Sauté till it is translucent.
  • Add grated ginger and garlic, sauté till raw smell is gone.
  • Add turmeric, coriander, fennel powders and sauté till spices get fragrant.
  • Mash the cooked potatoes and transfer to the hot pan.Mix well and fry for 5 minutes for the masala to coat well with potatoes. Check for salt.
  • Switch off the flame and garnish with chopped coriander leaves and breadcrumbs.

To Assemble:

  • Clean the capsicums and pat dry well. Cut the top part like shown in the picture.
  • Scoop out and discard the seeds from the capsicums.
  • Pre-heat oven to 200 degree Celsius for 10 minutes.
  • Meanwhile stuff each capsicum with the a table spoon of stuffing, then a layer of cheese, again with the stuffing mixture and top with cheese layer.
  • Close the capsicums with the top part.
  • Smear drop of oil on the capsicum skin. Place in a baking tray in the oven for 30-35 minutes.
  • Capsicums are ready to take out from the oven when you feel how cooked you need capsicums to be. I wait for the skin to shrink a bit.
  • Serve hot with tomato ketchep, lemon wedges or just plain.

To prepare Asparagus:

  • Cut the base of the asparagus up to an inch.
  • Sprinkle salt, pepper and olive oil to the asparagus and mix well.
  • Throw in asparagus to the oven in the last 10 minutes.
  • Throw in asparagus in the last 10 minutes.

March 12, 2013

Uzhunnu vada


Back home, Mom makes uzhunnu vada very rarely. Because of it's tedious task of grinding the urad dal in ammikkallu and anything deep fried is not that entertained. Yes, she prefers grinding in ammikkallu.  Whenever craving for uzhunnu vada, we grab it from the Ruchi veg restaurant, Kozhikode. As always, home-made ones will be the best in taste and better in hygiene.

My first hands-on with making vada shape was pretty much ok.

Recipe Source: Mom

Ingredients:

  • Urad dal - 1½ cups
  • Green chilly - 3 nos
  • Onion - 1 no, small size
  • Ginger - 1 inch piece
  • Curry leaf - few sprigs
  • Black Peppercorns - 2 tbsp
  • Baking soda - ½ tsp (optional)
  • Oil - to deep fry
  • Salt

Instructions:

  • Clean and soak the urad dal in water for 5-6 hours. Then grind the soaked urad dal without adding water into a fine paste. But I had to add couple drops of water to get a fine paste.
  • Coarsely crush the chopped onions, ginger, green chillies, curry leaves and peppercorns with a mortar & pestle.
  • Add the crushed mixture to the urad dal paste. Add salt, baking soda and mix well with your hands.
  • Heat oil in a deep pan. Let the oil be real hot and then reduce flame to medium.
  • Wet your hands, make a ball shape out of the uzhunnu vada batter, gently press on your palms and make a hole in the centre just like shown in the picture.
  • Drop it in the oil and let it cook, flip the vada till it's golden brown and crispy outside on both sides.
  • Drain the hot vadas on a kitchen tissue to soak the excess oil.
  • Serve hot with sambhar/chutney.
Notes:

Adjust the green chilly & peppercorns to your spice level.

March 7, 2013

Chicken Schnitzel with Mushroom Sauce


To prepare Chicken Schnitzel

Ingredients:

Chicken Breast - 2 nos
Plain flour - ¼ cup
Egg - 1 no, beaten
Breadcrumbs - ½ cup
Salt
Pepper
Oil - to shallow fry

Instructions:

  • Combine flour, salt, pepper in a bowl. In another bowl, beat the egg. Spread breadcrumbs as a layer on a plate.
  • Slit the chicken breast lengthwise, place the sliced chicken breast between cling film and pound it thin(I've skipped this step).
  • Dredge the chicken first in the flour and shake off the excess flour. Then dip the chicken in beaten egg Shake off the excess and then spread it on the breadcrumbs layer and coat with breadcrumbs well.
  • Heat oil in a pan and shallow fry the chicken on both sides. Cover with an aluminium foil to keep it warm.
  • Reserve the excess flour for the Mushroom sauce

To prepare Mushroom Sauce

Ingredients:

Butter - 1 tbsp
Mushroom - 8 nos, sliced
Garlic - 1 nos, finely chopped
Chicken stock - 1 cup
Sour cream - ¼ cup
Soya sauce - 1½ tbsp
Parsley - to garnish
Plain flour - which was used for coating chicken

Instructions:

  • Heat butter in a pan and add in chopped garlic and sliced mushrooms. Sauté till the water evaporates from the mushrooms.
  • Now add the reserved plain flour and fry for a minute.
  • Add in chicken stock. Allow it to boil.
  • Add the sour cream and soya sauce. Check for salt. As the stock and plain flour has salt content, make sure to check the salt.
  • Switch off the flame when the gravy thickens. Garnish with chopped parsley.

March 4, 2013

Slow cooked Spicy Chicken

As the name suggests, this was cooked in a low flame and results in a very delicious spicy curry.

My mom does all her cooking in a low flame. She says that enhances the flavour and yes it is absolutely right. Mummy is a pakka vegetarian; not even egg/milk & milk products. However her one and only daughter doesn't come in that category at all. I should say she has no problem in cleaning, cooking meat/fish and is a gifted cook. Though she doesn't check for taste in non-veg recipes, she gets to know what's missing in a recipe by it's aroma. I don't think much folks have got that talent :) Hats off to Mummy !!!

Ingredients:

Chicken - 1 whole, cut in small pieces
Onions - 3 nos, finely sliced
Green chilly - 1 no, slit lenghtwise
Ginger - 1 tbsp, finely grated
Garlic - 5 cloves, finley grated
Tomato - 1 no, finely sliced
Curry leaf - a sprig
Turmeric powder - 1 tsp
Kashmiri Chilli powder - 1 tbsp
Hot chilli powder - ½ tbsp
Coriander powder - 1½ tbsp
Cumin powder - ½ tbsp
Fennel powder - ½ tbsp
Garam masala - 1 tbsp
Oil - I've used olive oil
Salt
Water
Coriander leaves - to garnish

Instructions:
  • For chicken marination, dry roast the spices. Heat a pan in low flame. Add the mentioned powders including garam masala. Stir the spices until the spices get fragrant. Make sure not to burn the powders. Add a tablespoon of oil, salt  to the roasted powders and mix well. Apply this marinade to the cleaned chicken pieces and marinate for 2 hours.
  • Heat oil in a pan in a low flame. Add sliced onions slit green chilli and sauté till it turns slightly brown.
  • Then add grated ginger, garlic and sauté till raw smell is gone.
  • Add sliced tomatoes and sauté till it turns soft.
  • Add the marinated chicken pieces, curry leaf and roast for 5 minutes. Make sure to stir in between.
  • Add half a cup of water to the chicken and cover with a lid. 
  • When the chicken is cooked, let the gravy thicken. Do not cover with lid at this stage.
  • Switch off the flame and garnish with chopped coriander leaves.
Notes:
  • The slow you cook, the better will it taste. If in a hurry, carry on to cook in a medium flame :)
  • Adjust the spiciness to your taste. This recipe is slightly hot to our palette.
  • Make sure to stir in between so that the pieces doesn't get burnt.
  • This recipe pairs well with chappathi, rice, appam, pathiri etc

February 28, 2013

Cutlets in Tomato Sauce

We had a simple dinner last night, Home-made buns with Cutlets in Tomato sauce. Though it seems to be a simple dinner, but indeed a time consuming one. Still everyone loves cutlets.

Well, just thought of inventing something out of cutlets and it was a success. Instead of having plain cutlets, I prepared this simple tomato sauce and immersed the shallow fried cutlets in the sauce. This can be said my version of Meatballs in sauce. We all loved this preparation.

This time haven't used neither breadcrumbs nor egg for making these cutlets. Just make sure there shouldn't be any water in potatoes. I had leftovers of cooked mutton and made my job a bit easier.

To prepare cutlet balls:

Ingredients:

Bone-less Cooked Mutton - 1 cup, dry consistency
Onions - 3 nos, finely chopped
Green chilli - 2 nos, finely chopped
Ginger - ½ tbsp, finely grated
Garlic - 1 tbsp, finely grated
Potatoes - 3 nos, cut in cubes
Turmeric powder - 1 tsp
Coriander powder - 1 tbsp
Fennel powder - 1 tsp
Garam masala - 1 tbsp
Coriander leaves - handful, finely chopped
Oil
Salt

Instructions:
  • Place the potatoes and salt cut in cubes in a microwave safe bowl and cook without adding water until the potatoes turns soft. Once cooked, mash it well.
  • Heat oil in a pan. Add finely chopped onions, green chillies and sauté till it turns transparent.
  • Add grated ginger and garlic and sauté till the raw smell is gone.
  • Add turmeric powder, coriander powder, fennel powder, garam masala and sauté till the spices are fragrant.
  • Now add the dry cooked mutton and fry for few minutes. Let the flavours infuse. Check for salt.
  • Add the chopped coriander leaves and switch off the flame.
  • When the mixture has cooled down, roll and shape into small balls. Refrigerate the rolled cutlet balls for 30 minutes.
  • Pour oil in a pan and shallow fry the cutlet balls on all sides. Make sure not to overcrowd the pan.

To prepare Tomato Sauce:

Ingredients:

Egg Tomatoes - 3 nos, blanch the tomatoes
Onion - 1 no, finely chopped
Garlic - 2 nos, finely chopped
Cumin powder - ½ tbsp
Salt
Sugar - 1 tsp

Instructions:

  • To blanch the tomatoes, slit the tomatoes on the base. Boil water in a sauce pan and place the tomatoes.Take it out after 2 minutes when the skin would be able to pull apart. Blend the skinless tomatoes into a fine paste.
  • Heat oil in a pan. Add finely chopped garlic and sauté till the raw smell is gone.
  • Add chopped onion and sauté till it turns transparent.
  • Add tomato purée  salt, sugar and cumin powder. Cover with a lid and let it reduce to pouring consistency.
  • Place the shallow fried cutlet balls in the tomato sauce and keep it in flame for 5 minutes.
  • Switch off the flame and garnish with chopped coriander leaves.

February 25, 2013

Happy B'day to me !!


My first attempt with fondant and it paid my effort !!!!

February 22, 2013

Fried Semolina balls

An easy and perfect tea time snack; learnt from my mother-in law. It requires very few ingredients and just deep fry the batter.

Recipe Source: MIL

Ingredients:

Coarse semolina - 1 cup approx
Egg - 1
Sugar - 4 tbsp, as per taste
Baking powder - a pinch
Cardamom powder - ½ tsp
Oil - to deep fry

Instructions:
  • Pour oil to a saucepan and keep it on medium flame.
  • Beat the egg with a fork. Add sugar according to your taste and beat until dissolved.
  • Add cardamom powder, baking powder and mix well.
  • Now add coarse semolina until the mixture turns really thick (thicker than the idli consistency).
  • Allow the batter to rest for few minutes. 
  • When oil is medium-hot, dip in a spoonful of batter to the hot oil.
  • Once it turns golden brown colour on one side, just turnover.
  • Take out the fried semolina balls from out of the hot oil when the fried balls have turned to a nice brown colour.
Notes:
  • I'm unable to provide the accurate measurement of the semolina used as it depends on the size of the egg used & the coarse semolina variety.
  • When you dip the spoonful of batter and if the spreads without holding the shape, then you need to add more semolina to the batter to make it thick consistency.
  • When consistency is really thick, the batter will hold it's shape when dropped in hot oil.

February 20, 2013

Kappa Biriyani


Kappa/Tapioca./Cassava is one of  malayalee's comfort food. It can be prepared in several ways like Kappa vevichathu, Kappa puzhukku with/without mathi, Kappa curry etc. Kappa vevichathu is one of my favourite tea time snack :)

I've never had Kappa Biriyani before, heard about this from Sathya. He used to have it from a mess in Bangalore. I've not had the chance to taste it. This is not much famous in North Malabar. I got the recipe from our friends Benny & Treesa.

Kappa Biriyani is combination of any meat along with Kappa instead of rice. I've used Beef, can be replaced with chicken, lamb or pork. I think the best combo would be beef :)

This was indeed finger licking good and I would definitely include it in my menu once in a month.

Recipe Source: Treesa

Ingredients:

Tapioca - 1 kg, cut in chunks
Beef - 500 g
Grated coconut - 1 cup
Small onions/Shallots - 5-6 nos
Garlic - 5  nos
Green chilli - 5 nos, adjust to your taste
Curry leaves - 2 sprigs
Turmeric powder - 1 tsp
Cumin seeds - 1 tbsp
Salt
Water
Mustard seeds - ½ tbsp, to temper
Whole dry red chilli - 3 nos, to temper

For Beef Marination:

Turmeric powder - ½ tsp
Kashmiri chilli powder - 1 tsp
Coriander powder - ½ tbsp
Garam masala - 1 tsp
Ginger - ½ tsp, finely grated
Garlic - 1 tsp, finely grated
Lemon juice
Salt

Marinate the cleaned beef pieces with the above mentioned powders for an hour.

Instructions:

To prepare beef:
  • Heat oil in a pressure cooker. Add finely sliced onion (1 no) and sauté till it's golden brown.
  • Add the marinated beef and fry till the beef turns brown colour.
  • Pressure cook the beef until it is cooked well.
To prepare Kappa:
  • Take enough water and put the kappa pieces.
  • Add salt and turmeric powder.
  • Let the water boil and then close the lid for the pieces to get cooked. Stir in intervals.
  • When the kappa gets soft and cooked, discard the water.
  • Grind coconut, green chillies, garlic, a sprig of curry leaves,small onions, cumin seeds to a coarse paste.
  • Add the grounded coconut mixture paste to the cooked kappa and sauté for few minutes.
  • Add in the cooked beef as well.
  • Let the mixture gets thoroughly combined and cooked all together. Check for salt.
  • Sauté till the beef aroma spreads to the kappa pieces :) Kappa biriyani should have a thick consistency.
To Temper:
  • Heat coconut oil. When oil is hot, add mustard seeds. Wait till the mustard gets cracked.
  • Split the whole dry red chillies, curry leaves and stir for a minute until it changes color.
  • Add this to the Kappa Biriyani and stir well.
Notes:
  • Using a kilo of tapioca will lasts definitely for 2 days :)
  • Use coconut oil to temper the biriyani.

February 19, 2013

Parippu Vada

This reminds me of the thattukada near Crown theatre, where Achan & Moothachan used to get us hot crispy parippu vadas packed in greasy newspaper. Super delicious ones. I'm not sure whether that thattukada still exists there. Have to include this in the To do list when I reach Calicut. Back home, mom grinds the soaked dal on an ammikkallu which gives a nice flavour to vadas.

Serve hot parippu vadas with a cup of steaming hot tea and enjoy a nice evening.

Recipe Source: Mom

Ingredients:

Channa dal - 1½ cups
Onion - 1 no, finely chopped
Ginger -  tbsp, finely chopped
Green chilli - 4 nos, chopped
Curry leave - a sprig, coarsely chopped
Asafoetida - ½ tsp
Salt
Oil - to deep fry

Instructions:
  • Wash and soak the channa dal for 3-4 hours. On a kitchen towel, spread the channa dal and let it completely dry.
  • Once dried, grind the channa dal into a coarse paste and transfer to a bowl.
  • Add chopped onion, ginger, green chilli, curry leaves, asafoetida and salt to the coarse grounded channa dal and mix well.
  • Make into small size balls and lightly flatten each ball.
  • Heat the oil in a high flame at first. Then reduce the flame to medium hot and fry the vadas.
  • Place the fried parippu vadas on a kitchen tissue to soak the excess oil.
  • Serve hot.

February 17, 2013

Pepper Chicken

This is the way my mother-in law prepares Pepper chicken and is really yummy. I've added a dash of soya sauce to the dish to give a smooth rich flavour and is optional.
To get the authentic taste, use coconut oil, few more sprigs of curry leaves and no need of soya sauce :)

The cute bowl in this pic was gifted by our friend and batch-mate Rachana. Thanks Rachs !!

Recipe Source - Mom-in law

Ingredients:

Chicken - ½ kg
Onions -  2 nos, finely sliced
Ginger - 1½ tbsp, finely sliced
Green chilli - 3 nos, slit lengthwise
Tomato - 1 no, sliced
Turmeric powder - ½ tsp
Pepper powder - 2 tbsp, as per taste
Curry leaves - a sprig
Soya sauce - 1 tbsp (optional)
Salt
Water
Oil - Use coconut oil, I've used Olive oil.

Instructions:

  • Heat oil in a pan.Add sliced onions, slit green chillies, sliced ginger, curry leaves and sauté till golden brown.
  • Add turmeric and pepper powder and fry till the spices are fragrant.
  • Add sliced tomatoes and chicken pieces. Sauté till the masala coats on the pieces well.
  • Add enough salt, water and close with a lid for the chicken to get cooked.
  • When chicken is cooked, add pepper powder in case needed as per your taste.
  • Let the chicken turn to a semi-dry consistency and pour soya sauce. Cook for few more minutes and switch off the flame.

February 15, 2013

Home-made Chicken Thin Crust Pizza


Nothing beats a home-baked pizza and with such a wide variety of toppings to choose from, there's a pizza for every taste.My first attempt with home-made pizza base and pizza sauce was an instant hit. With just a little bit of preparations, we all can stack it up.

I'm not much fond of buying frozen stuffs. Fresh pizza dough is always better than the frozen pizza base. Making pizza dough is really simple. So lets knead !!!


Ingredients for Pizza dough:

All purpose flour - 1½ cups
Sugar - 1 tbsp
Dry yeast - 1 tsp
Lukewarm water - ½ cup
Oil - 1 tbsp
Salt - ½ tsp

Ingredients for Pizza sauce:

Egg (Roma) tomatoes - 3 nos
Garlic cloves - 3 nos, finely chopped
Capsicum - ¼ cup, finely chopped
Dried mixed herbs - 1 tsp, according to your taste
Oil - ½ tsp
Salt
Sugar

Toppings used:

Chicken strips - ½ cup, shallow fried
Green capsicum - handful,  sliced
Yellow capsicum - handful, sliced
Button Mushrooms - 5 nos, sliced
Onions - handful, sliced
Chilli flakes
Mozzarella cheese - garnish
I used Cheddar and Parmesan cheese to garnish

Marinated the chicken strips with ginger garlic paste, turmeric and kashmiri chilli powder, lemon juice and salt. Then shallow fried in oil.

How to make Pizza Sauce:
  • Blanch the tomatoes. For blanching, place water in a deep pan and let it boil. Slit an X mark at the base. Place the tomatoes in the boiling water and let it sit only for a minute. Transfer the tomatoes to cold water and peel off and discard the skin. Blend the skinless tomatoes and make a fine paste.
  • Pour oil on a hot pan and add finely chopped garlic. Sauté for a minute making sure not to burn them.
  • Add chopped capsicum and sauté till soft.
  • Now add the tomato purée and add a pinch of salt and sugar.
  • Close with a lid and let the sauce get thickened well like a spreadable consistency.
  • Add the mixed dry herbs before switching off the flame.
  • Left-over pizza sauce can be refrigerated for later use.
How to make Pizza dough:
  • Dissolve yeast and sugar in lukewarm water. Leave the mixture to prove for a few minutes. The yeast should start to bubble or foam in the water.
  • Sift the flour and salt. Make a well in the centre and pour the oil and dissolved yeast,sugar mixture.
  • Stir with a wooden spoon until dough becomes too firm to stir.
  • Using hands, knead the dough until it is smooth and elastic. 
  • Coat a bowl with a drizzle of oil so that the dough doesn't get stick.
  • Transfer the dough top the greased bowl and cover with a cling wrap.
  • Leave it for 1 hour to rise. Wait until the dough has doubled it's size.
  • Pre-heat the oven to 220 degree Celsius.
  • When the dough has risen, knock out the air bubbles on the dough using your palms.
  • Lightly flour the kitchen counter and knead the dough for 2-3 minutes.
  • Transfer the dough on to the baking tray and pat and push dough outwards until it reaches the edges, forming a thick rim on the outside. Choose any desired shape.
  • If you wish to have a thin crust, flatten it up very thin else go for a thick base.
To garnish the Pizza:
  • Spread the pizza sauce on top of the flattened dough.
  • Add all the toppings. 
  • Bake pizza for 10-15 minutes until the cheese has melted, the veggies get crunchy and the edges of the pizza base has turned slightly golden brown.

Pavlova.. It's Mini Pavlova's served for this special day!!

Happy Valentine's Day !!

Pavlova is supposed to be the National dessert of Aussies :) . It is meringue dessert with a crisp crust and soft and light inside. It is an integral part for Christmas lunch menu and yes I did bake Pavlova the first time during dec. We were in love with the very first bite of it.


As for this Valentines day, I'm baking P&P (Pizza & Pavlova) for my family :) I had plan only to make Pizza today; Sathya insisted he wanted a dessert to go with Pizza. I baked Mini Pavlova's this time; just halved the below mentioned ingredients.


The above snap was my first Pavlova attempt.

Recipe Source: Joy of baking

Ingredients:

Egg whites - 4 large, at room temperature
Caster sugar - 1 cup
Vanilla extract - 1 tsp
White vinegar - 1 tsp
Cornflour - ½ tbsp

For Topping:

Whipping cream - 1 cup
Granulated sugar - 1½ tbsp
Vanilla extract - ½ tsp
Fresh fruits to garnish

Instructions:
  • Preheat oven to 130°C. Line a baking tray with non-stick baking paper. Draw a 20cm circle on the paper, place on the tray, circle side down.
  • Use an electric mixer to whisk egg whites until soft peaks form. Add sugar, 1/2 cup at a time, whisking for 1 minute after each addition. Once all the sugar has been added, continue to whisk on high for 3 minutes, until the meringue holds very stiff and shiny peaks.
  • Test to see if the sugar is fully dissolved by rubbing a little of the meringue. The meringue should feel smooth, not gritty. If it feels gritty the sugar has not fully dissolved so keep beating until it feels smooth between your finger.
  • Combine cornflour, vinegar and vanilla essence. Add to meringue and whisk until just combined.
  • Use a spatula to spread meringue over the circle, smoothing the surface and sides. Use a palette knife to draw the meringue mixture upwards around the edge to create furrows. This will help support the sides of your pavlova, and prevent it from cracking too much and collapsing.
  •  Bake for 1 hour to 1 hour 15 minutes - the pavlova should be dry to the touch. Turn off the oven and leave to cool completely.
  • For topping, whip the cream with electric mixer and add sugar, vanilla extract.
  • Scoop the whipped cream and decorate with fruits.
  • Chill for 30 minutes and serve.
Notes:

After baking the Pavlova, turn the oven off. Leave it in the oven, with door ajar, for up to 6 hours to cool completely. If you remove the Pavlova when it's still warm it will cool too quickly, and may crack and collapse.

February 8, 2013

Beef Fry


I learnt to make Beef fry from my Mootha(aunt) and she had learnt this from our neighbour, Rahmath aunty. The Beef fry that aunty makes is just awesome. Her secret ingredient is paste made from whole dry Kashmiri chilli. Now to simplify it, I've just used the powder. Here is my slight variation of Rahmath aunty's Beef fry.

Sathya loves it to be semi-dry consistency; this can be made either gravy or a very dry consistency like beef varattiyathu.

Recipe Source : Rahmath aunty

Ingredients:

Beef - 750 grams
Onions - 2, finely sliced
Ginger - ½ tbsp, finely grated
Garlic - 1½ tbsp, finely grated
Tomatoes - 2, sliced
Cloves - 4
Cinnamon - 2  nos, 1 inch stick
Turmeric powder - ½ tsp
Kashmiri chilli powder - 1½ tbsp
Red hot chilli powder - ½ tsp
Coriander powder - 1 tbsp
Salt
Oil

Instructions:
  • Heat oil in a pan. Add cloves, cinnamon and sliced onions.
  • Fry the onions until it changes to golden brown.
  • Add grated ginger, garlic and sauté till the raw smell is gone.
  • Add the turmeric, kashmiri chilli, red hot chilli, coriander powders and roast till it is fragrant.
  • Add in sliced tomatoes and let it turn soft.
  • Add the cleaned beef pieces and fry till the mixture gets coated well with beef.
  • Pressure cook the beef.
  • When the beef is cooked, transfer the contents to a non-stick pan and roast it till your required consistency.
  • I've made my beef to semi-dry consistency.
Notes:

No need to add water while pressure cooking the beef as water will come from onions and tomatoes.
No need for adding oil while roasting the beef after it is cooked.

January 31, 2013

Navratan Korma


Ingredients:

Onion - 1 no (coarsely chopped)
Ginger - 1 inch piece (coarsely chopped)
Potato - 1 big (cut in cubes)
Carrot - 1 (cut in cubes)
Beans - 7-8 nos
Green chilly - 3 nos (slit lengthwise)
Broccoli/Cauliflower - 5 florets
Garlic - 4 cloves (coarsely chopped)
Bay leaf - 2 nos
Cinnamon stick - 1 inch piece
Coriander powder - 1½ tbsp
Cumin powder - 1 tsp
Garam masala powder - 1 tsp
Cream/Milk - ½ cup (adjust as per taste)
Coriander leaves - chopped (to garnish)
Salt
Oil
Water

Instructions:
  • Pour oil on a hot pan.
  • Add chopped onions and garlic sauté when it turns transparent.
  • Grind the sautéed onions and garlic mixture in a blender into a smooth paste by adding water.
  • Pour oil on the same pan. Add bay leaf and cinnamon stick and fry for a minute.
  • Add the onion ginger paste, coriander powder, cumin powder and fry for few minutes.
  • Add the chopped vegetables except broccoli/cauliflower, green chilly, garlic cloves, salt, water; cover and cook till veggies turn soft. Add the florets and cook till it turns crunchy.
  • Add cream/milk as per your taste. Let it boil for few minutes.
  • Switch off the flame, add garam masala and garnish with finely chopped coriander leaves.
Note:

Use any veggies of your choice; may include peas, capsicum, paneer cubes etc.
Substitute milk instead of cream for healthy alternative :)

January 25, 2013

Eggless Chocolate Cake with Chocolate frosting

I've baked this chocolate cake for my friend Bini & Jayesh. It's their wedding anniversary and was a surprise for the chocolate cake lovers.


This is really simple. It doesn't need an electric whisk; just a whisk/spoon for mixing up. This is the first time I've baked chocolate cake as Sathya is not fond of chocolates in cakes/desserts and always avoid any recipes which has cocoa/chocolate content.

Recipe Source: JoyofBaking

Ingredients:

All purpose flour - 1½ cups
Sugar - 1 cup
Cocoa powder - ¼ cup
Baking powder - 1 tsp
Baking soda - ¾ tsp
Salt - ¼ tsp
Melted Butter -1/3 cup (75 grams)
Warm water - 1 cup (240 ml)
Lemon juice or Vinegar - 1 tbsp
Vanilla extract - 1 tsp

Instructions:
  • Pre-heat oven to 180 C/ 350 F.
  • Lightly grease the cake pan with melted butter.
  • Sift the dry ingredients (all purpose flour, cocoa powder, baking powder, baking soda, salt ); add sugar. Whisk all ingredients together with a whisk/spoon.
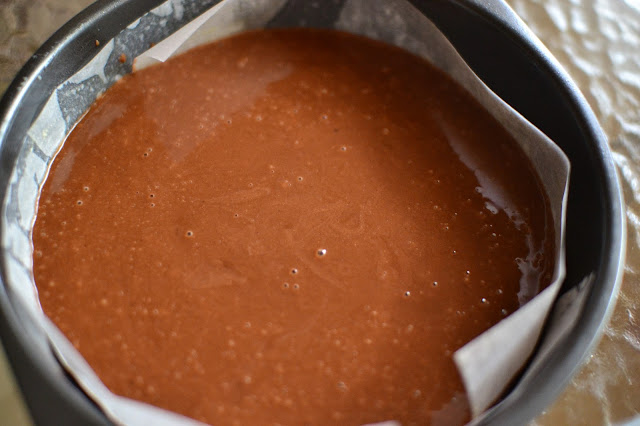
  • Add melted butter, warm water, lemon juice and vanilla extract to the dry ingredients and whisk until well combined.
  • Pour the batter to the cake pan and bake it for 30 minutes until the cake springs back when lightly touched at the centre or a toothpick inserted comes out clean.
  • Remove from oven and place the cake on a wire rack to cool.

Chocolate Frosting:-

Ingredients:

Semi-sweet chocolate - ½ cup (chopped)
Thickened cream - ¼ cup (cream contains 35% fat)
Butter - ½ tbsp

Instructions:
  • Place the chopped chocolate, cream, and butter in a heatproof bowl.
  • Place over a saucepan of simmering water and melt until smooth. 
  • Remove from heat and let stand at room temperature until it is of thick consistency. 
  • Transfer the cake to the cake pan so that when you pour the frosting over the cooled cake, it doesn't drizzle over.
  •  Let stand until frosting has thickened.
Notes:
  • I poured only half of the cake batter to the cake pan and the remaining poured into 6 cupcake moulds.
  • I've used the above mentioned quantity for making frosting as I used only of the batter to make a cake.
  • Double the frosting quantity if using the whole of the batter onto the cake pan.

January 20, 2013

Stuffed Brinjal Shallow Fry


I believe even not such hard core fans of brinjal will love this as it is stuffed, shallow fried and has got a very crispy outer layer. This wonderfully pairs with just plain rice and yoghurt. I tasted this first time from my Lalitamaami and she makes the best brinjal stuffed fry. Though I can't recollect the exact ingredients she used for the stuffing, I've made a similar one.

Though we are not big fan of brinjals, I love only this stuffed fry; but very hard to make Sathya to consume the brinjals. He hates all versions of brinjals. Phew.. In spite of all this trouble, I could make him eat just one.

Recipe Source: Adapted from Lalitamaami

Ingredients:

Small Brinjals - 10
Dry whole Kashmiri chilli - 6 (If using dry red hot chilli, use 3-4)
Channa dal - 2 tbsp
Urad dal - 1 tbsp
Coriander seeds - 1 tbsp
Cumin seeds - ¾ tbsp
Fenugreek seeds - 4 nos
Garlic cloves - 3 nos (finely sliced)
Curry leaf
Asafoetida - a pinch
Water
Turmeric powder - a pinch
Kashmiri Red chilli powder - a pinch
Oil
Salt

Instructions:
  • Pour a tablespoon of oil to hot sauce pan. Then add dry whole red chilli and roast for 2 minutes.
  • Add channa dal and roast until it turns golden brown.
  • Add urad dal, coriander seeds, cumin seeds, fenugreek seeds, sliced garlic cloves, curry leaves, salt and dry roast till it turns brown in color.
  • Add a dash of asafoetida after switching off the flame.
  • When cooled, grind the spices in a blender without adding water.
  • Once grounded, add drops of water until you can attain a consistency (make a perfect ball of grounded mixture). Check for salt.
  • Slice open the brinjals as shown below.

  • Stuff the grounded mixture inside the slits and tightly close.
  • Pour couple of tablespoons of oil in deep pan for shallow frying the brinjals.
  • When oil is hot enough, add a pinch of salt and stir well.
  • Place the stuffed brinjals in the oil. Sprinkle turmeric powder and kashmiri red chilli powder on the skin of brinjals.
  • Turn the brinjals so that it cook on all sides. Drizzle oil on the brinjals for a crispy skin.

January 19, 2013

Pav Bhaji


The first thing that come to mind seeing the hot buns is make Pav Bhaji. Oh, how I miss the Pav Bhaji served at a very small stall in Jaya Nagar, Bangalore where our gals gang used to eat out once in a week.

My Home-made Pav is all set and ready. Just make the Bhaji.

Recipe Source: Adapted from Sanjeev Kapoor with my slight variations

Ingredients:

Onion - 1 (finely chopped)
Green chilli - 2 nos (chopped)
Ginger - 1 inch piece (grated)
Garlic - 4-5 cloves (grated)
Tomatoes - 2 big
Potatoes - 2 nos
Carrot - 1 no
Peas - ¼ cup
Cauliflower - 4 florets (grated)
Capsicum - ¼ cup (finely chopped)
Pav Bhaji masala powder - 4 - 5 tsp (as per taste)
Coriander powder  - 1 tbsp
Cumin powder - 1 and ½ tsp
Fennel powder - 1 tsp
Garam masala - 1 tsp
Coriander leaves - to garnish
Kasthuri Methi - handful
Asafoetida - a dash
Oil - 2 tbsp
Butter - loads
Water
Salt
Chopped onions, coriander leaves, lemon juice - final garnish over served Bhaji

Instructions:
  • Boil and mash potatoes, carrot and peas with salt.
  • Heat oil and butter. Add finely chopped onion and green chillies. Sauté till translucent.
  • Add grated ginger and garlic and sauté till raw smell goes.
  • Add pav bhaji masala powder, coriander powder, cumin powder and fennel powder and sauté for few minutes.
  • Add chopped tomatoes, grated cauliflower, chopped capsicum and sauté till it turns soft.
  • Add mashed potato, carrot and peas.
  • Add water, salt and let the masala mixture boil for sometime.
  • Check for taste and adjust spices, add a dash of asafoetida accordingly to get that street Bhaji effect.
  • Switch off the flame, add a stick of butter and garnish with chopped coriander leaves and Kasthuri Methi.
  • Heat a pan, add butter. Slice the pav/bun in half and shallow fry in butter on both sides.
  • Serve the bun with steam hot Bhaji. Top it with chopped onions, chopped coriander leaves, lemon juice.

Home-made Buns/Pav


It's messy but quite fun to play with the bread dough :) I meant the kneading part. Just have a clean kitchen counter top and a scraper. Scraper will ease the kneading a bit.

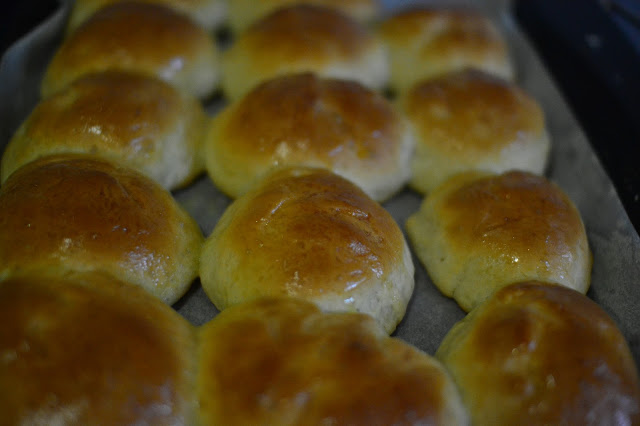
I anxiously waited for the dough to rise and shaped them up. The aroma of freshly baked buns surrounded my home. I'm using these buns as Pavs for Pav Bhaji and the remaining buns will be used for breakfast, Buns with butter or jam.

Recipe Source: Adapted from YummyOyummy

Ingredients:

All purpose flour - 2 cups + 1 cup
Yeast -  2 ¼ tsp 
Sugar - 2 tbsp + 1 tbsp
Warm Water - 2 tbsp
Warm milk - 1 cup
Butter - 4 tbsp + 1 tbsp
Salt - 1 tsp
Egg - 1 whole (slightly beat the egg)
Egg white - 1 

Instructions:
  • Dissolve yeast and 1 tbsp of sugar in warm water. Hot water kill the yeast. Make sure water is just warm enough. Keep it aside for few minutes until it froths and rises.
  • Meanwhile use 1 tbsp of butter to grease a bowl to keep the kneaded dough to rise.
  • Add salt, 2 tbsp of sugar, 4 tbsp of butter, 1 whole egg slightly beaten and milk to 2 cups of all purpose flour. Mix together with a spatula until well combined.
  • Transfer the contents to kitchen counter top. Add the remaining cup of flour and knead for 15-20 minutes. Use a scraper to ease the kneading.
  • After kneading for 20 minutes, transfer the dough to the greased bowl. Cover with a cling film and wait for 2-3 hours until the dough rise.
  • Once the dough has risen, remove the cling film and knead for 2 mins.
  • Roll the dough into small balls and place on a baking tray. Wait for 30 minutes as the rolled balls will again rise.
  • Pre-heat oven to 180 C/350 F for 10 minutes.
  • Beat egg white with few drops of water to make egg wash.
  • Brush egg wash on top of the rolled buns and place the buns in the oven.
  • Bake for 20-25 minutes until the top of the buns are slightly brown in color.
  • When buns are baked and out from the oven, take a cube of butter and spread butter on top to get a glazing effect.